How to Assemble the CaptureLevel
Setting up your CaptureMatterLevel is a quick and intuitive process designed to get you capturing accurate Matterport scans in minutes. The system arrives in three parts and requires only a few simple steps to assemble.
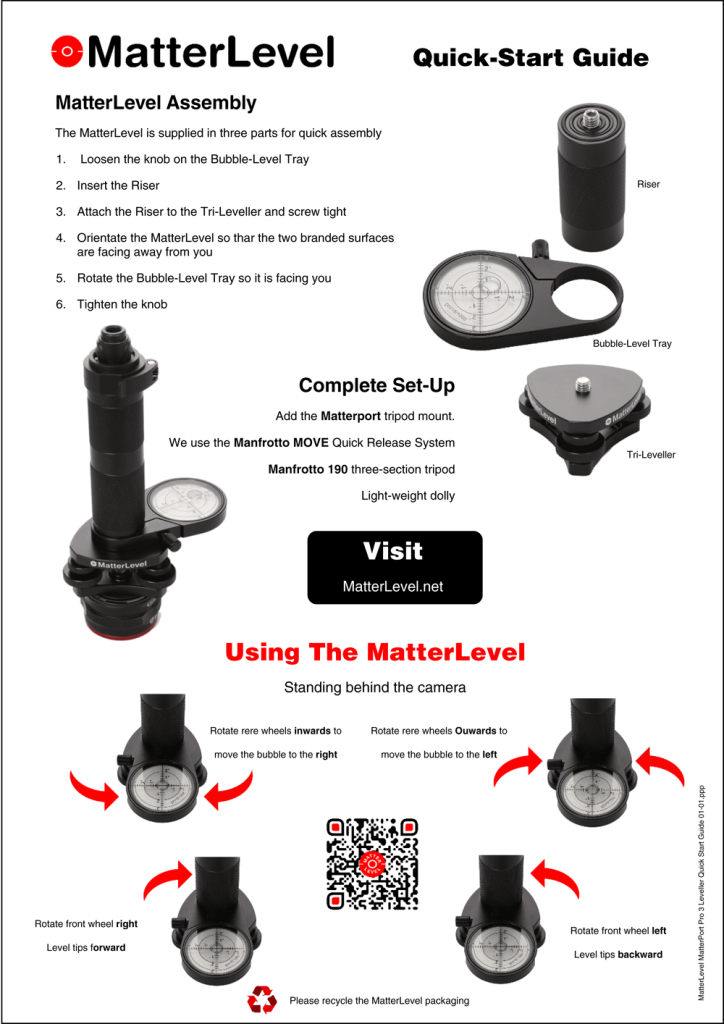
CaptureLevel Assembly
The MatterLevel comes in three components for fast, hassle-free setup. To assemble:
- Loosen the knob on the Bubble-Level Tray.
- Insert the Riser into the opening on the tray.
- Attach the Riser to the Tri-Leveller and screw it securely into place.
- Orientate the MatterLevel so the two branded surfaces are facing away from you.
- Rotate the Bubble-Level Tray so that it is now facing towards you.
- Tighten the knob to lock everything firmly in position.
Your CaptureLevel is now ready for tripod mounting.
Complete Set-Up
To achieve the most stable and efficient scanning workflow, we recommend pairing the MatterLevel with the following equipment:
- Matterport tripod mount
- Manfrotto MOVE Quick Release System – ideal for rapid camera changes
- Manfrotto 190 three-section tripod – sturdy yet lightweight
- Light-weight dolly – perfect for smooth movement between scan positions
This combination provides enhanced precision, ease of use, and a more streamlined on-site experience.
Using the CaptureLevel
Once fully assembled and mounted, it’s time to fine-tune the level. Stand behind the camera, facing the bubble level.
Adjusting the Rear Wheels
- Rotate the rear wheels inwards to move the bubble to the right.
- Rotate the rear wheels outwards to move the bubble to the left.
Adjusting the Front Wheel
- Rotate the front wheel to the right to tip the level forward.
- Rotate the front wheel to the left to tip the level backward.
These small adjustments help you achieve perfect levelling, ensuring optimal scan accuracy with your Matterport Pro3 camera.